Skin
Beauty Berry Wine Recipe

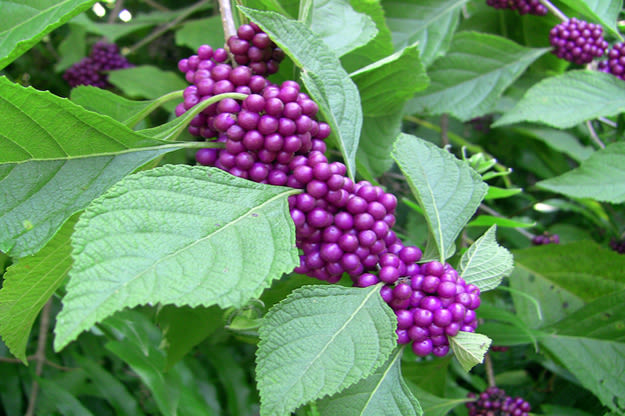
The wonderful beverage known as beautyberry wine embodies the essence of the Callicarpa americana or American beautyberry plant. The vivid purple berries that this plant bears are well-known for growing in clusters along its branches.
The characteristics of this unusual fruit can be preserved by making beauty berry wine, which is a delightful beverage that goes well with a range of foods or can be enjoyed on its own. This post will go over the steps involved in producing beauty berry wine at home, from picking the berries to bottling the final product.
Harvesting Beauty Berries
The berries must be harvested before you can begin crafting gorgeous berry wine. Depending on the location, beautyberries usually ripen in late summer or early fall. Seek for clusters of luscious, plump, completely purple berries.
Using pruning shears or scissors, carefully clip the clusters off the plant, being careful not to damage the berries. Wearing gloves is a good idea when gathering berries because they might discolor your skin.
After gathering the berries, cut off any leaves or stems and give them a good rinse in cold water to get rid of any remaining dirt or debris. As you prepare the remaining ingredients, let the berries drain in a colander.
Ingredients for Beauty Berry Wine
To make beauty berry wine, you will need the following ingredients:
- 4 cups of beautyberries
- 7 cups of water
- 3 ½ cups of sugar
- 1 package of wine yeast
- 1 teaspoon of yeast nutrient
- 1 teaspoon of acid blend
- Campden tablets (optional)
- Pectic enzyme (optional)
It’s critical to employ wine yeast that has been specially formulated for winemaking, as other yeast varieties might not ferment correctly.
Getting the Beauty Berry Need Ready
Using a potato crusher or a spoon, crush the berries in a big pot to begin preparing the beautyberry. After adding the water, heat the mixture until it boils. Simmer the berries for around ten minutes, stirring from time to time, over low heat.
After turning off the heat, take the pot and let the liquid cool to room temperature. After the mixture has cooled, strain it into a clean container using cheesecloth or a fine mesh strainer, pressing on the particles to extract as much liquid as possible.
At this stage, you can add Campden tablets to the must to kill off any wild yeast and bacteria if you like a cleaner wine. For information on the proper dosage, refer to the package instructions.
The Process of Fermentation
After the must cools, move it to a fermentation container, like a food-grade plastic bucket or glass carboy. Stir the sugar until it dissolves fully after adding the sugar, pectic enzyme, acid blend, and yeast nutrition to the must.
Next, add the wine yeast to the must after preparing it as directed on the package. To let gases escape during fermentation, cover the fermenting vessel with a fresh cloth or a lid with an airlock.
The wine will continue to ferment for one to two weeks, or until the bubbling stops, if you place the fermentation vessel in a cold, dark location. This means that the first fermentation is finished.
Aging and Racking
Once the initial fermentation is over, strain the wine and discard the sediment into a clean container. This method, called racking, aids improve the wine’s clarity.
Once the wine starts to clarify and sediment begins to build again, cover the container and let it ferment for a further four to six weeks. If needed, rack the wine one more to get rid of any sediment that might be left.
Bottle the wine using sterile, clean bottles and corks or caps, making sure to leave a tiny space at the top of each bottle for headspace.
Before drinking, let the bottled wine mature for a minimum of six months to a year to allow the flavors to develop and soften.
Conclusion
You can capture the aromas of this lovely plant and make a handmade wine that will wow your friends and family by making beautiful berry wine at home. It’s an enjoyable and fulfilling process. Why not give it a shot and see for yourself the exquisite qualities of beauty berry wine?


The nose, a centerpiece of human physiognomy, stands as a hallmark of individual identity. While its primary functions—facilitating respiration and detecting aromas—are universal, the diversity in nasal forms is both staggering and fascinating. Some nose shapes dominate populations, while others are so rare they elicit wonder. But what, precisely, constitutes the rarest type of nose? Let us traverse the realms of anatomy, genetics, and cultural resonance to uncover the answer.
Anatomy and Variation: The Underpinnings of Nasal Uniqueness
Before delving into the extraordinary, it’s essential to comprehend the fundamental structure of the nose and the elements shaping its distinctiveness.
Structural Components of the Nose
- Nasal Bones: Form the upper bridge, lending foundational rigidity.
- Cartilage: Confers flexibility and shapes the tip and lateral contours.
- Nasal Septum: Divides nostrils, ensuring balanced airflow.
- Soft Tissue: Adds curvature and dynamic movement to the nose.
These elements, influenced by heredity, ethnicity, and environment, orchestrate a nose’s architecture.
Determinants of Nasal Morphology
- Genetic Blueprint: Nasal shape emerges from an intricate genetic interplay.
- Ethnic Adaptation: Ancestral climates mold nasal forms; slender noses prevail in frigid zones, while wider noses dominate humid locales.
- Age and Trauma: Time and injuries can subtly transform nasal aesthetics.
Recognizing Familiar Nose Types
Common nasal shapes abound across global demographics. Understanding these helps us appreciate the uniqueness of rarer forms.
- Roman Nose: Distinguished by a prominent, gently arched bridge; often depicted in classical sculpture, prevalent in European lineages.
- Button Nose: Petite and rounded with a slightly uplifted tip, often evoking youthful charm.
- Straight Nose: A linear bridge devoid of dips or curves, revered for its symmetry.
- Nubian Nose: A broad base coupled with an elongated bridge, celebrated within African diasporas for its striking allure.
- Hawk Nose: This shape exudes boldness, featuring a pronounced downward curve reminiscent of a raptor’s beak.

A rarity in Nasal Forms
Rare nasal configurations arise from genetic anomalies, evolutionary adaptations, or developmental peculiarities.
Noteworthy Rare Noses
- Fleshy Nose: Bulbous with pronounced soft tissue, less prevalent than streamlined shapes.
- Celestial Nose: Marked by a concave bridge and uplifted tip, its rarity lies in the pronounced upward tilt.
- Pinched Nose: A slim and tapered form, occasionally the result of surgical intervention or specific genetic traits.
The Pinnacle of Rarity: Uncommon Combinations
The rarest nose transcends individual traits, merging several uncommon attributes into one visage. For instance, a celestial nose paired with a profoundly sharp tip and exaggerated curvature is exceptionally unusual.
Genetic Conditions Yielding Unique Noses
- Binder Syndrome: Leads to an underdeveloped nasal bridge.
- Pierre Robin Sequence: Affects facial structure, creating recessed nasal features.
Cultural Perceptions of Rare Noses
Societal lenses magnify the significance of rare nose shapes, attributing symbolic and aesthetic value across epochs.
- In Media and Fashion: Unique noses captivate audiences, positioning their bearers as icons of individuality.
- Historic Standards: Ancient Egyptians prized slender noses for their perceived elegance, while Roman society lauded aquiline noses as emblems of authority.
- Contemporary Movements: Social media champions diversity, fostering an appreciation for distinctive features.
Genetics: The Architect of Nasal Rarity
Heredity and Evolution
- Inheritance Patterns: Unusual features often emerge from recessive traits passed discreetly through generations.
- Evolutionary Influence: Narrow noses, adapted for frigid air, and broad noses, efficient in humid climates, showcase humanity’s adaptability.
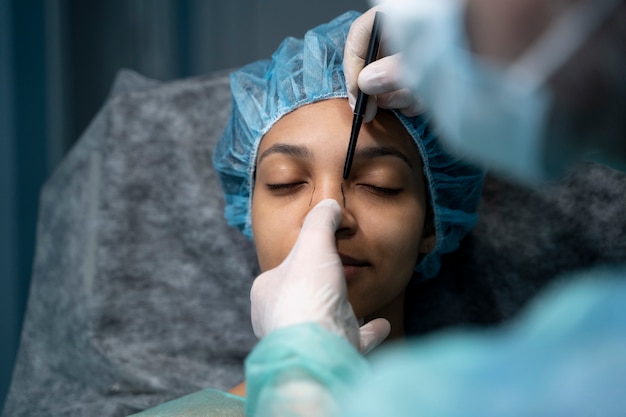
Surgical Crafting of Rare Noses
Modern rhinoplasty offers the possibility of replicating rare nasal forms, albeit with caution.
- Rhinoplasty Trends: Precision is paramount when emulating rare features.
- Balancing Risks: Overcorrection risks functional issues, underscoring the need for moderation.
Embracing Nasal Uniqueness
Whether common or extraordinary, the nose is a personal signature. Celebrating its individuality fosters self-acceptance and underscores humanity’s rich tapestry of diversity.
Conclusion
The rarest nose type defies singular definition, arising from a confluence of exceptional traits shaped by heredity, environment, and cultural perceptions. Its rarity enriches the spectrum of human beauty, reminding us that uniqueness is a virtue worthy of reverence.
FAQs
- What governs nasal shape?
Hereditary factors, cartilage structure, and environmental influences shape nasal appearance. - Can nasal shape evolve over time?
Yes, age and physical trauma can alter its form. - Are rare noses universally admired?
Attractiveness is subjective; rare noses often gain admiration for their distinctiveness. - Can surgery replicate rare shapes?
Yes, but achieving natural-looking results requires meticulous precision. - What’s the most prevalent nose type?
Button and Roman noses are among the most ubiquitous globally.

Eczema and psoriasis stand among the most prevalent skin disorders affecting individuals across the globe. When these conditions manifest on the feet, they can cause significant discomfort and pose aesthetic dilemmas. This article delves into the origins, manifestations, and remedial options for eczema and psoriasis of the feet, supplemented by illustrative depictions.
Understanding Eczema: How It Manifests on the Feet
Defining Eczema and Its Underlying Triggers
Eczema, medically termed atopic dermatitis, is a chronic dermatological ailment characterized by inflammation, redness, and relentless itching. Common catalysts include allergic reactions, environmental irritants, and inherited predispositions.
Symptoms of Eczema on the Feet
- Parched, fissured skin.
- Reddened and swollen areas.
- Persistent itch, often intensifying nocturnally.
- Formation of vesicles in severe instances.
Visual Representations of Eczema on Feet
Individuals afflicted may observe inflamed, reddened patches or blistering. Imagery frequently aids in accurate visual diagnosis.
Psoriasis: A Chronic Autoimmune Condition with Distinctive Features
What Defines Psoriasis?
Psoriasis emerges as a chronic autoimmune disorder, spurring the overproduction of epidermal cells. This surplus accumulates, forming plaques frequently observed on the feet.
Manifestations of Psoriasis on the Feet
- It thickened, flaky skin.
- Reddish plaques are often veiled with silvery scales.
- Painful fissures or cracks in the skin.
- Nails may exhibit changes indicative of nail psoriasis.
Visual Evidence of Psoriasis on Feet
Typical depictions reveal heavily scaled skin with a silver-tinged overlay, highlighting the distinctiveness of this condition.

Differentiating Between Eczema and Psoriasis
Key Visual Contrasts
- Eczema: Features redness, oozing vesicles, and pronounced itchiness.
- Psoriasis: Exhibits dry, flaky plaques with silvery layers.
Diverging Etiologies
Eczema is often rooted in allergic hypersensitivity, whereas an autoimmune response drives psoriasis.
Treatment Modalities for Eczema and Psoriasis
Managing Eczema
- Moisturizing Agents: To counteract dryness.
- Topical Corticosteroids: For reducing inflammation.
- Allergen Avoidance: Identifying and steering clear of triggers.
- Natural Remedies: Coconut oil or colloidal oatmeal baths for soothing relief.
Treating Psoriasis
- Topical Applications: Corticosteroids or Vitamin D derivatives.
- Phototherapy: Exposure to UV light.
- Systemic Medications: Biologics or oral therapies for advanced cases.
- Home Solutions: Aloe vera or saline baths to ease symptoms.

Preventive Strategies for Eczema and Psoriasis on Feet
Skincare Routine
- Daily hydration with emollients.
- Use of gentle cleansers to avoid irritation.
Avoidance of Triggers
- Wearing breathable footwear.
- Mitigating stress, a known exacerbator of psoriasis.
Conclusion
Eczema and psoriasis affecting the feet can profoundly impact the quality of life. Through precise diagnosis, bolstered by visual indicators, and effective treatments, sufferers can find substantial relief. Consistent skin care and proactive avoidance of known triggers are indispensable in preventing recurrences.
FAQs
- How does foot eczema differ from fungal infections?
Eczema often presents as redness and dry skin, while white patches and a pungent odor typically mark fungal infections. - Can children develop eczema or psoriasis on their feet?
Yes, eczema is especially common among younger individuals. - What is the typical duration for treating foot psoriasis?
Treatment timelines vary based on severity, with chronic cases requiring long-term management. - Is it possible to have both eczema and psoriasis concurrently?
Although rare, it is feasible to experience both conditions simultaneously, necessitating distinct treatment plans. - Is there a definitive cure for psoriasis?
While psoriasis cannot be eradicated, its symptoms can be effectively managed through appropriate interventions.
-

 Skin9 months ago
Natural Oil-Free Face Moisturizer Reviews & Buyers Guide
-
 Hair3 weeks ago
Does a Flat Iron Kill Lice? Fact or Myth?
-

 Hair9 months ago
Does a Flat Iron Kill Lice? Fact or Myth?
-

 Skin8 months ago
About Face Beauty: Tips for Enhancing Your Natural Beauty
-

 Hair9 months ago
Function of Beauty: Personalized Hair Care for Your Unique Needs
-

 Skin8 months ago
Beautiful Nails: Tips and Tricks for Healthy and Gorgeous Nails
-

 Hair9 months ago
Titanium Flat Iron vs. Ceramic
-

 DIY Cosmetics8 months ago
Empire Beauty School: