Makeup
“Face on Face” Makeup: Guide to Achieving a Flawless Look
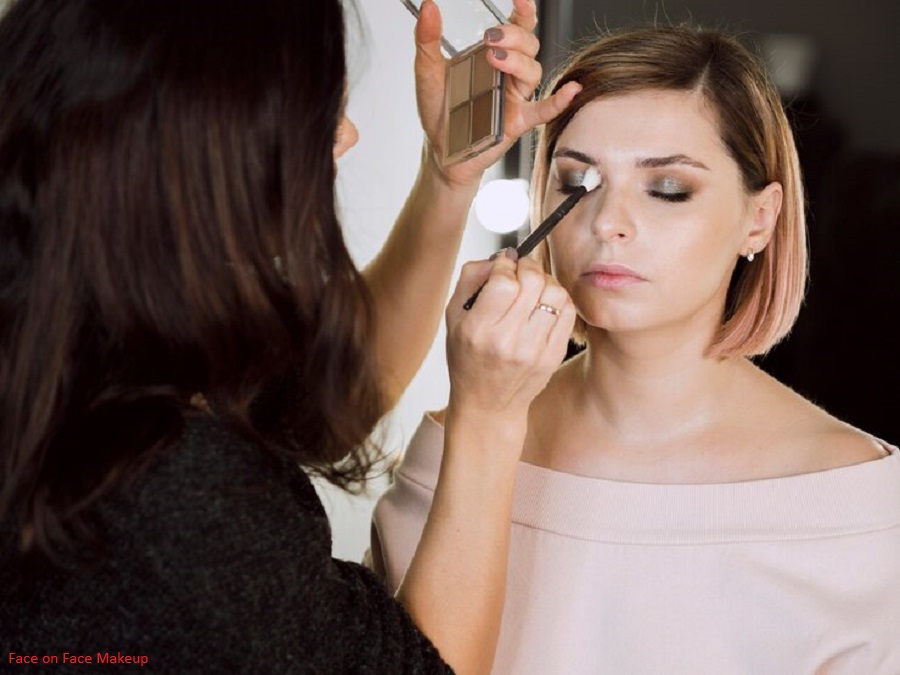
Many people now include makeup in their everyday routines as a necessary tool for creative self-expression and to accentuate their natural qualities. “Face-on-face” makeup is one popular method that has become more and more well-known in recent years. By layering cosmetics, one can achieve a flawless finish that resembles a second skin. The steps to creating a face-on makeup appearance, the supplies you’ll need, and some advice for attaining the best results are all covered in this article.
What is Face on Face Makeup?
Layering various cosmetic products to achieve a smooth, perfect finish is known as “face-on-face makeup.” The aim is to get a flawless, nearly second-skin-like appearance for the skin. When applied correctly, this method can be done at home using the appropriate supplies and tools. It is frequently utilized in professional makeup applications, such as for photoshoots or films.
Steps to Achieve Face-on-Face Makeup
To get a flawless finish, various processes are involved in creating a face-on-face makeup effect. This is a how-to guide that will walk you through getting the look:
Prepare Your Skin: It’s critical to properly prepare your skin before putting on any makeup. To start, wash your face to get rid of any debris, oil, or leftover makeup. To hydrate and prepare your skin for makeup application, use a moisturizer afterward.

Apply primer: Apply foundation to provide a perfect basis for the remainder of your makeup and to help even out your skin tone. Apply foundation using a makeup brush or sponge, making sure it matches your undertone and skin tone. Evenly blend the foundation, paying attention to areas that require extra coverage.
Conceal Imperfections: To cover up any blemishes, dark circles, or other skin flaws, apply concealer. For a flawless finish, use the concealer with a tiny brush or your hands and mix it into the foundation.
Set Your Makeup: Use a translucent powder to set your makeup so that it lasts the entire day. Apply the powder sparingly to your entire face with a big, fluffy brush, paying particular attention to the areas that are prone to oiliness.
Contour and Highlight: While highlighting gives your face a healthy sheen, contouring aids in defining your facial features. Apply a highlighter to the high points of your face, such as the cupid’s bow, brow bones, and tops of your cheekbones, after using a contour powder or cream to sculpt your nose, cheekbones, and jawline.
Add Color: Use bronzer to warm up your complexion and blush to give your cheeks a little color. Blend the blush toward your temples after applying it to the apples of your cheeks. For a sun-kissed effect, softly contour your face’s edges with the bronzer.
- Set Your Makeup: Use a setting spray to seal in your makeup so it stays in place throughout the day. Spray the setting spray evenly over your makeup, holding it about an arm’s length away from your face.
Items You’ll Require
You’ll need the following makeup items to pull off a face-on-face look:
Cleanser
- Moisturizer
- Primer
- Foundation
- Concealer
- Translucent powder
- Contour powder or cream
- Highlighter
- Blush
- Bronzer
- Setting spray
Tips for Getting the Best Results
The following advice will help you apply makeup on your face with the greatest possible results:
. To guarantee a smooth canvas for applying makeup, start with a cleansed and well-hydrated face.
. Use the proper tools to apply and mix your makeup, such as brushes and makeup sponges.
. To prevent harsh lines or uneven spots, take your time and thoroughly blend your makeup items.
. Use a gentle hand to prevent a cakey appearance when applying makeup, especially concealer and foundation.
. Use a setting spray to help your makeup look more natural and last longer.

conclusion,
Layering cosmetic items to achieve a flawless finish that resembles a second skin is known as “face-on-face makeup.” You may obtain a stunning all-day makeup look by using the products and tools recommended in this article and following the methods given in the article.
Makeup
Joah Beauty
What is Joah Beauty, exactly? If you’ve never heard of this cutting-edge company before, you’re in for a treat. A rising star in the cosmetics business skillfully combines the greatest elements of K-beauty influences with a dedication to affordability and quality. With a splash of style and a sprinkle of fun, they strive to make high-quality beauty products accessible to all.
The Unique Selling Proposition of Joah Beauty
K-Beauty Influence
Joah Beauty takes a lot of inspiration from the well-known K-beauty trends. product creation is based on K-beauty, which is renowned for its cutting-edge advancements in skincare and makeup. You therefore receive the newest and best in terms of trends and technologies related to beauty.
Affordability without Compromising Quality
Offering premium goods at affordable costs is one of Joah Beauty’s unique selling points. The company’s objective is to provide high-quality beauty products that are affordable for everyone since they think everyone should feel beautiful.
Joah Beauty Product Range
Face Products
Foundations and Concealers
A large selection of foundations and concealers made to accommodate various skin tones and kinds is available at Joah Beauty. Their products ensure that your skin looks smooth and vibrant by providing high coverage without sacrificing a natural finish.
Blushes and Highlighters
Joah’s assortment of highlighters and blushes makes it simple to add a hint of color and shimmer. These cosmetics are designed to seem natural on the skin while giving it a radiant finish and a healthy flush.
Eye Products
Eyeshadows
The makeup palettes from Joah Beauty are visually stunning. They come in a variety of bright and neutral hues that let you achieve any style, from delicate daytime elegance to dramatic, strong eyes.
Eyeliners and Mascaras
With Joah’s eyeliners and mascaras, definition and precision are essential. Their mascaras give lashes volume and length, while their eyeliners apply smoothly and are smudge-proof.
Lip Products
Lipsticks and Lip Glosses
The lipsticks and glosses from Joah Beauty are available in a variety of colors and finishes. For every lip type—matte, glossy, or satin—there is an ideal match.
Lip Care
It’s easy to keep lips nourished and supple with Joah’s lip care products. These products—which range from washes to balms—make sure your lips are always smooth enough to kiss.
Skincare Products
Cleansers and Toners
Efficient cleansers and toners from Joah Beauty’s skincare range eliminate pollutants and prime the skin for additional treatments. These products are appropriate for daily use and are mild yet efficient.
Moisturizers and Serums
Joah’s moisturizers and serums are primarily designed to provide hydration and nutrition. These cosmetics are brimming with useful components that support the preservation of radiant, healthy skin.

Ingredients and Formulations
Clean Beauty Commitment
Clean beauty is the mission of Joah Beauty. They stay away from dangerous ingredients and concentrate on creating safe, efficient formulations that are considerate of both the environment and your skin.
Key Ingredients in Joah Products
Joah Beauty uses potent substances with a reputation for improving skin, like vitamin C and hyaluronic acid. Whether you use their skincare or makeup products, these elements combine to give you the best possible results.
The Packaging and Aesthetics
Design Philosophy
Joah Beauty’s packaging is not only functional but also aesthetically pleasing. The design philosophy revolves around simplicity and elegance, ensuring that each product looks as good as it performs.
Eco-Friendly Packaging Initiatives
Joah Beauty is looking into eco-friendly packaging choices as part of its commitment to sustainability. This involves reducing waste and utilizing recyclable resources to help customers make more ecologically friendly decisions.
Joah Beauty’s Popular Collections
Top-Selling Products
Numerous best-selling items from Joah Beauty have garnered a devoted fan base. These consist of their creatively designed mascaras, adaptable eyeshadow palettes, and moisturizing lipsticks.
Limited Edition Collections
Joah Beauty occasionally creates limited edition collections with distinctive formulas and hues. Many times, these compilations become instant hits, with fans excitedly awaiting their release.
How to Choose the Right Products for You
Skin Type Considerations
It’s crucial to take your skin type into account while selecting Joah Beauty products. Joah offers skin care solutions that are customized to suit all skin types, including oily, dry, and combination.
Makeup Preferences
The Joah product selection process also takes your makeup style into account. There is something in their lineup for everyone, regardless of your preference for a natural look or for playing around with bright colors.
Application Tips and Tricks
Foundation and Concealer Application
Use a primer first for a perfect basis, then use a brush or sponge to apply Joah’s foundation for uniform coverage. To attain a flawless look, use their concealer to cover up any imperfections or dark circles, blending it thoroughly.
Eye Makeup Techniques
Joah’s eyeshadows can be used to accentuate your eyes; use lighter tones on the lid and darker shades on the crease to create dimension. For a polished appearance, apply mascara and eyeliner last.
Lip Product Application
Start by defining the shape of your lips with a lip liner to make them stand out. For even coverage and the ideal pout, apply Joah’s lipstick or gloss starting in the middle and blending outward.
Joah Beauty’s Presence in the Market
Online Availability
Online beauty merchants and the company’s official website both sell Joah Beauty items. This makes it simple to shop from the convenience of your house and peruse their whole collection.
In-Store Presence
Select stores also carry Joah Beauty for individuals who would rather purchase in person. This enables you to view and handle the things before deciding to buy them.
Customer Reviews and Testimonials
Positive Feedback
Many customers have expressed their satisfaction with Joah Beauty’s goods due to their affordability and high quality. A multitude of users commend the efficacy and diversity of their products.
Constructive Criticism and Responses
Joah Beauty has, like any brand, been the target of constructive criticism. They are dedicated to always enhancing their offerings and clientele’s experience, and they take these comments seriously.
Collaborations and Partnerships
Influencer Collaborations
Joah Beauty frequently works with influencers to promote their goods and get them in front of more people. These partnerships generate conversation and offer firsthand accounts from reliable sources within the beauty industry.
Brand Partnerships
Joah Beauty collaborates with other brands in addition to influencers to provide distinctive, limited-edition goods and collections. These collaborations frequently produce innovative and thrilling products that people adore.
Joah Beauty’s Impact on the Beauty Industry
Setting Trends
Joah Beauty is a trendsetter in the business, frequently setting the standard with cutting-edge goods and distinctive formulas. Their impact is seen in the rising demand for cosmetics with a K-beauty aesthetic.
Inspiring Other Brands
Because of Joah Beauty’s success, more companies are now prioritizing quality and cost, which has increased competition and dynamism in the beauty sector.
Sustainability and Ethical Practices
Cruelty-Free Commitment
Joah Beauty is dedicated to abstaining from animal testing and makes sure that none of their products are. This moral position appeals to a lot of customers who value animal welfare.
Sustainable Sourcing
Not only does Joah Beauty not use cruelty, but it also prioritizes sustainable sourcing. Their devotion to the environment is further demonstrated by their efforts to employ products that are sourced ethically and responsibly.
Future of Joah Beauty
Upcoming Product Launches
With multiple new product launches planned, big hopes for the future. These include cutting-edge formulas and fashionable hues that are sure to please enthusiasts.
Expansion Plans
Joah Beauty is looking into ways to increase its footprint in new markets as they continue to grow. This entails expanding availability into other nations and areas.
Conclusion
Joah Beauty is a revolution in reasonably priced, premium cosmetics; it’s more than just a beauty brand. a rising star in the industry thanks to its diverse product line that suits all skin types and preferences, significant K-beauty influence, and dedication to sustainable and clean procedures. Joah’s wide range of products caters to all skill levels, so there’s something for everyone. Thus, why not give it a shot and discover for yourself why everyone is talking about it?
FAQs
- Is Joah Beauty cruelty-free?
- Yes, Joah Beauty makes sure that none of its products are tested on animals as part of its commitment to being a cruelty-free brand.
- Where can I buy Joah Beauty products?
- Joah Beauty products can be purchased in a few chosen boutiques, on their official website, and through some other beauty merchants.
- What makes Joah Beauty different from other brands?
- offers high-quality, reasonably priced, and innovative products that incorporate elements of K-beauty.
- Are Joah Beauty products suitable for sensitive skin?
- Yes, use skin-friendly, mild ingredients in their product formulations, making them appropriate for sensitive skin.
Makeup
Subtle Beauty: Embracing Natural Elegance
Accepting and improving your inherent features in a way that seems unforced and subtle is the key to subtle beauty. It is the antithesis of excessive glamour, emphasizing genuineness, grace, and simplicity.
The Importance of Subtle Beauty
In a society where striking fashion and dramatic cosmetics are frequently the focal points, understated beauty provides a welcome change. It inspires us to value our inherent qualities, fostering confidence and self-acceptance.
The Philosophy Behind Subtle Beauty
Natural is Beautiful
The conviction that nature is wonderful is the fundamental component of subtle beauty. It’s about being authentic and not depending on fancy haircuts or a lot of cosmetics to show off who you are.
Less is More
Less really is more when it comes to understated beauty. The goal is to use the right amount of products to accentuate your natural features rather than overdo it.
Enhancing Your Features
The goal of subtle beauty is to highlight your best features in a way that seems effortless and natural rather than masking or altering them.
Skincare for Subtle Beauty
Daily Skincare Routine
Sufficient skincare is the cornerstone of understated beauty. Every day, cleanse, tone, and moisturize your skin to maintain its youthful appearance.
Importance of Hydration
Happy skin is hydrated skin. To keep your complexion looking radiant, apply hydrating skincare products and drink lots of water.
Sun Protection
It’s essential to shield your skin from the sun. Use sunscreen every day to protect your skin and keep it looking young.

Makeup Tips for a Subtle Look
Foundation and Concealer
Select a concealer and foundation that are just the right shade for your skin tone. Use sparingly to balance out your skin tone without completely masking it.
Natural Eye Makeup
Choose subtle eyeshadows and a sparing amount of mascara. You can use eyeliner to accentuate your eyes without drawing attention to them, but go light on the application.
Soft Lip Colors
For a modest beauty look, pink lip tints that are gentle or soft are ideal. They enhance your natural features with just the right amount of color.
Haircare for a Natural Look
Embracing Your Natural Hair Texture
Appreciate the texture of your hair as it is. Choose hairstyles that go well with your natural hair type, whether it’s curly, straight, or wavy.
Simple Hairstyles
Make hairstyles basic and manageable. For a more understated aesthetic, basic braids, ponytails, and loose waves are excellent choices.
Haircare Products
Make use of hair care products that bring out the natural texture and gloss of your hair. Steer clear of bulky styling products that could make your hair appear greasy.
Fashion and Subtle Beauty
Choosing the Right Fabrics
Choose natural textiles such as silk, linen, and cotton. These fabrics provide a refined, subtle appearance while being comfortable.
Neutral Colors and Simple Patterns
A wardrobe that exudes understated beauty is defined by neutral hues and straightforward designs. You can easily mix and combine them because they are classic and adaptable.
Accessorizing Lightly
Minimize the number of accessories. You can add style to your ensemble without going overboard with a delicate bracelet, a basic necklace, or a set of stud earrings.
Lifestyle Choices That Enhance Subtle Beauty
Healthy Diet
A diet high in fruits, vegetables, and whole grains promotes overall health and radiant skin.
Regular Exercise
Engaging in physical activity not only maintains your physical appearance but also elevates your emotional state and vitality.
Mental Well-being
Mental health is just as important as physical health. Practice mindfulness, meditation, or any activity that helps you relax and stay positive.
Subtle Beauty in Different Cultures
Asian Perspectives
In many Asian cultures, subtle beauty is highly valued. The emphasis is on clear skin, natural makeup, and elegant simplicity.
Western Views on Natural Beauty
There is a growing movement in Western cultures to value natural beauty. Minimalist makeup and sustainable fashion are becoming more popular.
Middle Eastern Emphasis on Elegance
Grace and elegance are major components of Middle Eastern beauty. The two most important things are elegant clothing selections and subtle makeup.
The Role of Confidence in Subtle Beauty
Inner Beauty Reflects Outward
The foundation of subtle beauty is confidence. When you’re confident in yourself, your look reflects that.
Building Self-Confidence
Build your self-confidence by focusing on your strengths and enjoying your achievements. Positive affirmations can also assist raise your confidence.
Positive Affirmations
Using positive affirmations daily can improve your self-esteem and encourage a positive self-image.
Celebrities Who Embody Subtle Beauty
Emma Watson
Emma Watson is a true inspiration, with her casual style and natural makeup looks making her a superb example of subtle beauty.
Lupita Nyong’o
Lupita Nyong’o’s flawless complexion and understated style are examples of the impact that understated beauty can have.
Cate Blanchett
Cate Blanchett’s timeless grace and modest style make her a fantastic role model for people embracing subtle beauty.
Subtle Beauty Trends in 2024
Minimalist Makeup
The goal of minimalist makeup is to look natural with less ingredients. Because it is so easy to use, this trend is becoming more and more popular.
Sustainable Fashion
In addition to being environmentally responsible, sustainable fashion adheres to the ideas of understated elegance. It’s about selecting classic pieces over fads and high quality over quantity.
Natural Hairstyles
In 2024, natural hairstyles that highlight the texture of your hair will be fashionable. They accentuate your inherent attractiveness and are simple to maintain.
Common Misconceptions About Subtle Beauty
Subtle Does Not Mean Plain
It’s common to misinterpret being dull or uninteresting. In actuality, it’s about subtly improving your inherent qualities.
It’s Not About Perfection
It’s common to misinterpret subtle beauty as being dull or uninteresting. In actuality, it’s about subtly improving your inherent qualities.
Age and Subtle Beauty
Ageless and timeless is a subtle beauty. It demonstrates that grace and minimalism are timeless and may be worn by individuals of all ages.
Subtle Beauty for Special Occasions
Weddings
For weddings, subtle beauty can be achieved with soft makeup, natural hairstyles, and elegant dresses. It’s about looking like the best version of yourself.
Work Events
A polished yet natural look is appropriate for work-related gatherings. Professional clothes, easy hairstyles, and little makeup can help you seem terrific.
Casual Outings
Subtle beauty can come through even on informal occasions. A casual hairdo, easy attire, and little makeup are ideal for a sophisticated yet carefree appearance.
DIY Tips for Achieving Subtle Beauty
Homemade Face Masks
To nurture your skin, make face masks with natural ingredients like avocado, yogurt, and honey.
Natural Hair Treatments
Use natural oils like coconut oil and argan oil to keep your hair healthy and shiny. These treatments are easy to do at home and very effective.
Easy Makeup Hacks
Try easy beauty tips like dabbing on highlighter on your cheekbones for a natural shine or substituting a tinted moisturizer for foundation.
Conclusion
Embracing Your Unique Beauty
The key to subtle beauty is embracing your individual qualities and accentuating them naturally and effortlessly. It’s an honoring of you just as you are.
The Timelessness of Subtle Beauty
Subtle beauty endures forever. It is timeless and enduring, even in the face of changing beauty or fashion trends. You can attain an elegant and timeless look by emphasizing natural beauty.
FAQs
What is the best foundation for a subtle look?
For a subtle look, choose for a lightweight, buildable foundation that complements your skin tone. Tinted moisturizers and BB creams are excellent choices as well.
Can I achieve a subtle beauty look with minimal makeup?
Of course! You may still gorgeously accentuate your features with minimal makeup. Prioritize a thorough skincare regimen and apply makeup sparingly to accentuate your inherent beauty.
How do I choose the right skincare products for subtle beauty?
Select skincare products based on your skin type and individual concerns. Products with harsh chemicals should be avoided; instead, look for ones with natural ingredients.
What are some easy hairstyles for a natural look?
For a natural look, straightforward hairstyles like braids, ponytails, and loose waves work great. Adopt a natural hair texture and use as few styling products as possible.
How can I boost my confidence to enhance my subtle beauty?
By emphasizing your advantages and taking care of yourself, you may increase your confidence. You can also improve your self-esteem by surrounding yourself with encouraging individuals, leading a healthy lifestyle, and repeating positive mantras.
Makeup
Aveda Beauty Salon
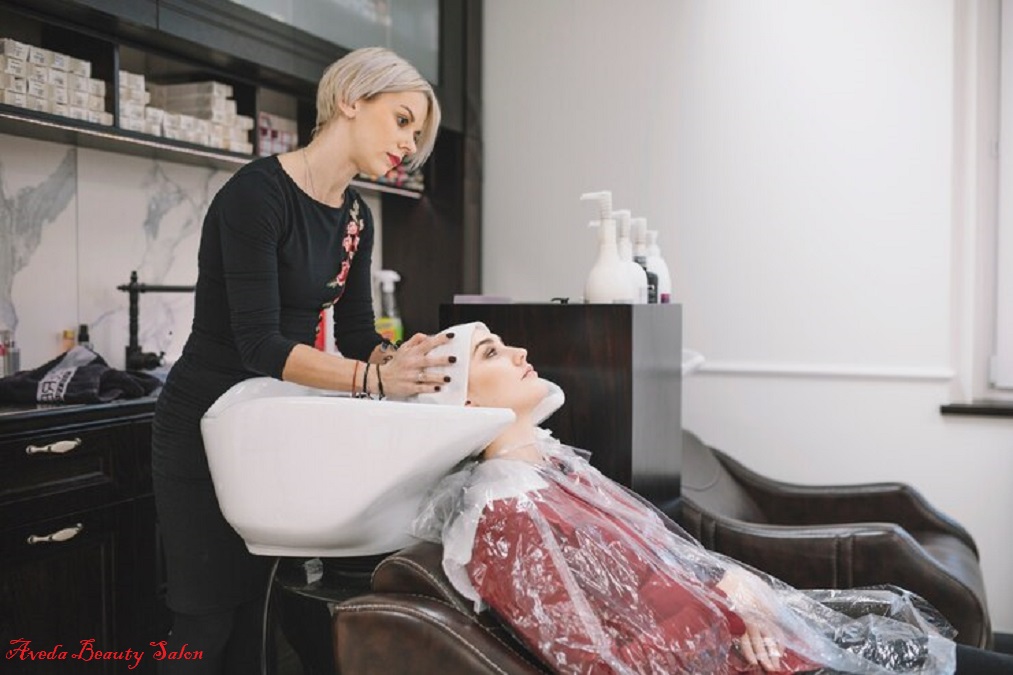
Few brands ring as true as Aveda when it comes to treating oneself. Aveda Beauty Salon, renowned for its all-encompassing approach to wellness and beauty, provides a special fusion of luxury and sustainability. But in the congested beauty market, what sets Aveda apart?
Overview of Aveda
Aveda, a leader in environmentally responsible beauty products and services, is known for fusing cutting-edge science with natural ingredients. Aveda hair salons offer a wide range of services to meet various beauty demands, from skin treatments to hair care.
The Philosophy of Aveda
The faith in nature’s strength lies at the core of Aveda’s concept. The company is dedicated to producing goods and services that support environmental sustainability while also enhancing beauty. From the goods they create to the ways they give back to society, Aveda aims to care for the world in which we live.
History of Aveda Beauty Salon
Founding and Early Years
Aveda was founded in 1978 by Horst Rechelbacher, a visionary who recognized the potential of plant-based beauty products. His passion for natural ingredients and holistic health laid the foundation for what would become a global beauty empire.
Evolution and Growth
Aveda has opened salons and institutes all around the world as it has grown in popularity over time. Because of its dedication to sustainability and high quality, the brand has become more popular among beauty fans.
Aveda’s Commitment to Sustainability
Environmental Responsibility
Aveda’s dedication to the environment is evident in every aspect of its operations. From sourcing raw materials to packaging, Aveda ensures that its practices are eco-friendly and sustainable.
Sustainable Practices in Products and Services
Aveda uses recyclable packaging, renewable energy, and organic ingredients to name a few strategies for reducing its environmental impact. The company’s commitment to sustainability is evident in the salon services it offers, where eco-friendly procedures are included in regular business operations.

Range of Services Offered
Hair Services
Hair services at Aveda beauty salons are customized to each client’s specific demands. Whether you want a full makeover or a basic cut, Aveda’s skilled stylists can produce outstanding results.
Haircuts and Styling
Aveda offers an extensive selection of haircut and styling options, ranging from traditional cuts to modern designs. Because of their training, their stylists can recognize your hair type and preferences, guaranteeing a customized service.
Color Services
Plant-based, non-toxic dyes are used in Aveda’s color services to produce vivid, long-lasting effects. The colorists at Aveda can help you achieve your desired look, whether you want to play around with a daring new hue or just enhance your natural color.
Skin Care Services
The skin care products from Aveda are made to revitalize and revive your skin. Your unique skin concerns are addressed by estheticians who create customized facials and treatments using products made with natural components.
Facials and Treatments
Aveda provides a range of skin care services to address a variety of skin types and issues, from acne treatments to anti-aging facials. To guarantee the best outcomes, their estheticians employ Aveda’s distinctive products.
Makeup Services
For both everyday wear and special events, Aveda’s cosmetics services are ideal. Their makeup experts apply products that nurture your skin and accentuate your inherent beauty.
Body Services
The goal of Aveda’s body treatments is to revitalize and soothe both your body and mind. Their offerings, which include body cleanses and massages, provide a comprehensive approach to wellbeing.
Massages
Aveda offers a calming and restorative massage experience that combines techniques from throughout the globe. Whether you require a soothing aromatherapy session or a deep tissue massage, Aveda’s therapists are adept at providing efficient treatments.
Body Treatments
Exfoliating scrubs, detoxifying wraps, and hydrating treatments that leave your skin feeling smooth and soft are among the body treatments offered by Aveda. The purpose of these services is to improve your general health.
Aveda’s Signature Products
Hair Care Products
Shampoos, conditioners, and styling products made with natural ingredients are part of Aveda’s hair care collection. These products are made to enhance your hair’s inherent beauty while protecting and nourishing it.
Skin Care Products
The botanicals and essential oils used in Aveda’s skin care products offer your skin effective and delicate care. Their products, which range from cleansers to moisturizers, address a range of skin types and issues.
Body Care Products
Body care products from Aveda include oils, scrubs, and lotions that nourish and revitalize your skin. Natural components are blended into these products to create a luxuriant and invigorating experience.
The Aveda Experience
Ambiance and Environment
Entering an Aveda salon is like entering a peaceful, tranquil haven. The tranquil setting, peaceful music, and comforting fragrances all work together to create an ambiance that encourages relaxation and well-being.
Customer Service Excellence
The exceptional customer service provided by Aveda is a testament to their dedication to excellence. You receive considerate treatment as soon as you walk into the salon, guaranteeing a wonderful and fulfilling experience.
Why Choose Aveda Beauty Salon?
Quality of Services
Aveda is well known for providing excellent services with outstanding outcomes. You will receive the greatest care possible thanks to their usage of natural ingredients and knowledgeable staff.
Expertise of Stylists and Therapists
The stylists and therapists on Aveda’s staff have extensive training and expertise in their disciplines. They are unique in the market because of their knowledge and enthusiasm for wellness and beauty.
Customer Testimonials and Reviews
Real-life Experiences
Consumers gush about their visits to Aveda salons, praising the staff’s professionalism and the caliber of treatments provided. Numerous patrons value the individualized care and the tranquil setting.
Ratings and Feedback
Aveda routinely gets great reviews and ratings from customers. The brand’s dedication to quality and client pleasure is evident in these evaluations.
Aveda Institute
Training Programs
For those who aspire to become beauty professionals, The Aveda Institute provides extensive training programs. Their program prepares students for lucrative professions in the beauty and wellness industries by covering a wide range of topics.
Career Opportunities
In the beauty industry, Aveda Institute graduates are in great demand. Because of the institute’s stellar reputation, its graduates are certain to have access to a diverse array of professional prospects.
Aveda and Community Involvement
Charitable Activities
Aveda actively participates in charitable endeavors, lending assistance to a range of charities and institutions. A fundamental component of their philosophy is their dedication to giving back to the community.
Community Outreach Programs
The main goals of Aveda’s community outreach initiatives are sustainability and environmental awareness. Aveda hopes to improve society and the environment with these projects.
Booking and Appointments
How to Book
Appointing a time slot at an Aveda salon is easy and practical. Bookings can be made in person at your closest salon, over the phone, or online.
Appointment Policies
The goal of Aveda’s appointment policies is to guarantee a convenient and easy experience. Their accommodating cancelation and scheduling procedures meet the demands of their hectic clientele.
Loyalty Programs and Memberships
Rewards and Benefits
Regular customers can receive incentives and privileges from Aveda’s loyalty programs. These programs improve your salon experience with discounts, special perks, and exclusive offerings.
How to Join
It’s simple to sign up for Aveda’s loyalty programs, which have many advantages. To begin reaping the benefits, register online or at the Aveda salon that is closest to you.
Aveda’s Global Presence
Locations Around the World
Aveda is present throughout the world, having salons and institutes in numerous nations. Customers can easily get their excellent services and products because of their broad reach.
Expansion Plans
Aveda keeps growing, adding additional sites and servicing a wider global clientele. Their dedication to expansion guarantees that more individuals will be able to benefit from the Aveda difference.
Special Offers and Promotions
Seasonal Discounts
Aveda makes its services and goods more affordable by frequently offering seasonal discounts and promotions. For customers, these exclusive deals offer excellent value and savings.
Exclusive Offers
Aveda offers special deals only to members of its loyalty program and regular customers, in addition to seasonal reductions. These deals include exclusive price breaks, cost-free services, and more.
Conclusion
Aveda Beauty Salon’s dedication to sustainability, quality, and client pleasure makes it stand out as a pioneer in the beauty sector. Aveda offers a wide range of services to cater to all needs, including excellent hair care, revitalizing skin treatments, and soothing body treatments.
FAQs
- What makes Aveda products different from other beauty brands?
- Natural components are used in the formulation of Aveda products, which are designed to be environmentally friendly. Their dedication to sustainability distinguishes them from numerous other firms.
- Can I purchase Aveda products online?
- Aveda goods can be bought on their official website and by some accredited merchants.
- What should I expect during my first visit to an Aveda salon?
- On your initial visit, a stylist or therapist will provide you with a full assessment and then a customized service based on your needs.
- Are Aveda products suitable for all skin types?
- Aveda has a selection of products made to address various skin types and issues. The ideal products for your unique requirements can be suggested by their estheticians.
- How can I become a member of Aveda’s loyalty program?
- You can register for Aveda’s loyalty program online or at the Aveda salon that is closest to you. Among the many advantages of membership are discounts and special offers.
-

 Hair5 months ago
Does a Flat Iron Kill Lice? Fact or Myth?
-

 Skin5 months ago
Natural Oil-Free Face Moisturizer Reviews & Buyers Guide
-
 Hair5 months ago
Does a Flat Iron Kill Lice? Fact or Myth?
-
 Hair5 months ago
How to Curl Your Hair with a Flat Iron for Beginners
-

 Hair5 months ago
Titanium Flat Iron vs. Ceramic
-
 Hair5 months ago
Function of Beauty: Personalized Hair Care for Your Unique Needs
-
 Skin4 months ago
Beautiful Nails: Tips and Tricks for Healthy and Gorgeous Nails
-

 DIY Cosmetics4 months ago
Empire Beauty School:
